


A Guide To Planting Seed Potatoes
- News
- 298 views
Are you dreaming of growing your own crop of delicious, home-grown potatoes? Whether you’re a seasoned gardener or a first-time grower, planting seed potatoes is an exciting and rewarding experience. This guide will walk you through the entire process, from choosing the right seed potatoes to harvesting your crop. Let’s dig in!
What are seed potatoes?
Seed potatoes are not seeds in the traditional sense. They are called tubers- essentially small potatoes- that have been specially grown and certified for planting. These are distinct from supermarket potatoes because they’re guaranteed to be free from diseases that could harm your crop. By using certified seed potatoes, you set yourself up for success with healthy plants and a bountiful harvest.
Choosing the right Seed Potatoes
There are many varieties of seed potatoes to choose from, and the best choice depends on your gardening goals. Here are some popular categories:
-
Early Potatoes: There are two types of early seed potatoes based on planting times: first early and second early. These mature quickly and are perfect for new gardeners. Examples include “Swift” and “Rocket”
-
Maincrop Potatoes: Ideal for storing, maincrop varieties like “Maris Piper” and “Desiree” are versatile and great for mashing, roasting or frying
-
Speciality Potatoes: Unique varieties like purple or fingerling potatoes can add a touch of novelty to your garden
Consider your climate, soil type, and culinary preferences when selecting seed potatoes. We offer a range of seed potatoes to suit your specific needs- whether that be a potato perfect for roasts, or something beautiful with a salad.
Preparing your seed potatoes
Before planting, it’s important to prepare your seed potatoes. This process is called chitting and helps your potatoes sprout before they go into the ground.
-
Start Early: Begin chitting 4-6 weeks before your planned planting date
-
Place in a light area: arrange the seed potatoes in a single layer with the “eyes” (small dimples) facing up. A cool, bright location like a windowsill is ideal
-
Wait for Sprouts: In a few weeks, you’ll see sturdy green or purple sprouts, about 1 inch long. Your seed potatoes are now ready to plant
Preparing your garden bed or containers
Potatoes grow best in loose, fertile soil that drains well. Here’s how to prepare the growing area:
-
Test and amend the soil: potatoes prefer slightly acidic soil with a pH of 5.5 to 6.5. Test your soil and add compost or well-rotted manure to boost fertility
-
Choose a sunny spot: potatoes need plenty of sunlight to thrive
-
Consider containers: if you’re short on space, potatoes grow exceptionally well in large containers, grow bags or even old buckets with drainage holes
How to plant seed potatoes
Planting is easy! Follow these steps:
-
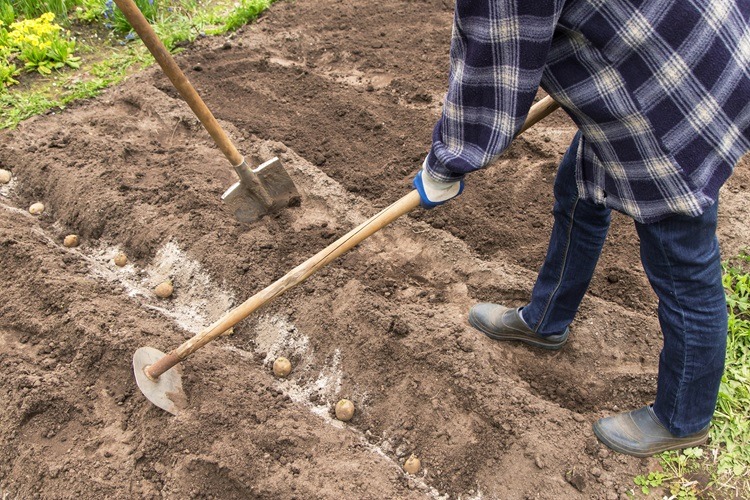
Dig trenches or holes: in your garden bed, dig a trench about 6 inches deep. If using containers, fill the bottom with about 4 inches of soil
-
Plant the seed potatoes: place the seed potatoes with the sprouts facing upward. Space them 12 inches apart in rows that are about 24-30 inches apart
-
Cover with soil: cover the seed potatoes with about 4 inches of soil, leaving room to add more soil as the plants grow
Caring for your potato plants
Potatoes are relatively low maintenance, but a little care will ensure a healthy harvest
-
Water regularly: keep the soil consistently moist but not waterlogged. Water deeply once or twice a week depending on rainfall
-
Hill the soil: as the plants grow, mound soil or compost around the base of the stems. This prevents the potatoes from being exposed to sunlight, which can cause them to turn green and become inedible
-
Watch for pests: look out for common pests like potato beetles and aphids. Use organic pest control methods, such as neem oil or hand-picking pests, to protect your plants.
Harvesting your potatoes
The best part of growing potatoes is the harvest! Here’s how to know when it’s time
-
Early potatoes: Harvest these as “new potatoes” about 10-12 weeks after planting, once the plants have flowered
-
Maincrop potatoes: wait until the foliage turns yellow and dies back, usually 15-20 weeks after planting
-
Gently dig up tubers: use a garden fork or your hands to carefully lift the potatoes from the soil, being mindful not to damage them
Storing your potatoes
After harvesting, allow the potatoes to cure for a few days in a cool, dark place to toughen their skins. Brush off excess soil, but don’t wash until you’re ready to use them. Store in a cool, dry location, such as a basement or pantry for long term use.
Troubleshooting common problems
Even with the best care, you might encounter some issues. Here are a few tips:
-
Green potatoes: caused by sunlight exposure. Always hill soil to cover tubers
-
Blight: a fungal disease that can devastate crops. Choose resistant varieties and avoid overhead watering
-
Small potatoes: may result from overcrowding or insufficient water. Ensure proper spacing and consistent moisture
Planting seed potatoes is a satisfying way to grow a versatile and delicious crop. With the right preparation and care, you’ll enjoy an abundant harvest that can be used in countless recipes. Ready to get started? Check out our wide selection of certified seed potatoes today!